I've been learning a thing or two about how to take advantage of hydroponic gardening, without a full hydroponic rig.
(I'll document HOW I'm doing this in this post.)
Advantages of hydroponics, compared to growing in dirt:
• Starts are reported to grow MUCH faster.
• If you set them up right, they don't need watering nearly as often, which means less work for me.
• I'm led to believe that I can leave peppers and other (small) veggies in these small hydroponic containers forever: no need to up-pot. (I'm guessing that tomatoes will be too big, but we'll see.)
• I can grow stuff in the winter. More specifically, I can work on growing stuff in the winter.
• It's new and different and cool. I get to try new things.
Disadvantages of hydroponics, compared to growing in dirt.
• I'll need to be careful transplanting hydroponically started plants into dirt.
• I don't know how to make hydroponic nutrition, and buying them is more expensive than making compost from grass and leaves and chicken poop.
• A full hydroponic system (which I do not have) will be far more complex than dirt gardening.
So far I've started some tomatoes and some lettuce (romaine) in hydroponics pots. The real goal is the pepper plants, but they're being slow to germinate.
Wednesday, December 18, 2019
Hydroponic Fun! Why.
Labels:
2019,
Experiment,
Greenhouse,
Starts,
Winter Gardening
Hydroponic Fun! How.
I've been learning a thing or two about how to take advantage of hydroponic gardening, without a full hydroponic rig. This system works for a simple, low-maintenance (not maintenance free) hydroponic system.
(I'll document WHY I'm doing this in another post.)
You'll need:
• Hydroponics Net Cups.
I use a 2" size.
• A (plastic?) container with a lid. (More on this in a
minute.)
• Spray
paint (dark-ish) to make the container opaque.
• Rock wool cubes
that fit the cups.
• A hole
saw that fits the cups size you're using.
• Hydroponic
nutrients. (More on this later.)
Here’s how I did it. (The pictures show a lot of it, but
probably not every step. You can figure it out.)
1. Gather
your lidded containers. These need to be opaque (to keep algae from growing in
the nutrient solution), so paint them if you need to. Have fun with the paint
if you like. The plants won’t care.
2. Guy
your supplies: You’ll need the net cups and the paint sooner than the rock
wool.
3. Use
the hole saw that fits your net cups and cut a hole in the lids for the net
cups to fit comfortably into. (Or cut them first and paint them later, if you
like them prettier.)
4. Mix
your hydroponic nutrients according to their directions. Fill the containers up
to the bottom of the net cup.
5. I
generally cut out the center of the bottom of the net cup, so that the seedling’s
root will fit through easily, and also so that if/when I decide to plant these
in the garden, I can get the roots out.
6. Cut
your rock wool cubes to fit the net cup if necessary. Slice it open. Nestle the
seedling in the rock wool. Put this into the net cup, with the roots dangling
below the net cup.
7. Put
the lid with the hole on the container. Stick the net cup / rock wool /
seedling into the hole prepared for it. Ensure that the roots are dangling in
the nutrient solution. Set them in a well-lighted place.
8. Check the levels of the nutrient fluid every week or two. You'll want to keep it up to the bottom of the net cup. If it develops funny colors, pour it out and replace it with fresh nutrients.
9. Congratulate
yourself on successfully starting hydroponic gardening.
A word about the nutrient solution: Starter nutrition is
sometimes different from Ongoing
nutrition. The seedlings need a gentler solution, a different solution, and
it will take care of the plants from seedlings (or cuttings, if you’re cloning)
until they’re six or eight inches tall. At that point, you’ll probably want to
graduate to the more mature nutrient solution.
Labels:
2019,
Experiment,
Greenhouse,
Starts,
Winter Gardening
Friday, October 18, 2019
Winterizing the Garden
Winterizing the garden beds.
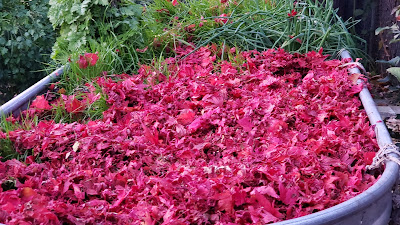
Winter Rye and maple leaf mulch. There's some red clover in there, too, but I think the mulch may have overwhelmed it.
I like how it looks.
Winter Rye and maple leaf mulch. There's some red clover in there, too, but I think the mulch may have overwhelmed it.
I like how it looks.
Subscribe to:
Posts (Atom)