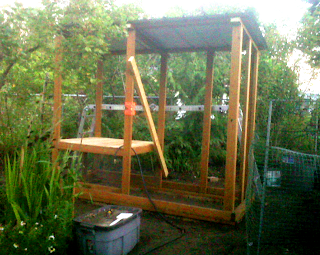
When we added a couple more chickens, we realized it's time for a real chicken coop.
So this is the place where we're going to build the coop. We're clearing space in what was once a fairly unruly garden.
Laying out bricks for a foundation. These were part of our fireplace at one time.


While Milady was preparing the area and laying out the foundation, I was building the base of the coop.
First: I laid out the perimeter with treated 2x4s. These will set on top of the bricks.
I reinforced the corners.
Then I installed treated 2x4s vertically on the perimeter.

Here's a close-up of the corner's construction.
And the wooden base installed on top of the brick foundation.
If you look closely, you'll see a layer of chicken wire dangling from the bottom of this base.
Here's the closeup: the chicken wire was about 12" wide. We buried it in the dirt around the coop. This is designed to discourage whatever creatures wish to dig under the foundation to get at the Ladies.
Then we set up the studs.
The orange gizmo is a level to help me identify "vertical." It doesn't go there automatically.

Getting a start on the frame for the roof.
We're planning an exit on the end, under the coop itself, to let the chickens in and out. We have odd ideas for this, involving a "chicken tunnel" to another area for them to roam.

Getting the screen up under the coop. Milady does details so much better than I.
And we have a roof up.
First wall is up.
Time to make a floor.
A good floor will be easy to clean. For this coop, that means linoleum. I've glued it on, and now I'm applying pressure the best way I know how.
Nicest linoleum floor around. Nicest floor in a chicken coop we know of.
There is a drawback. We've since found out that if they're tweaking out about something, then the pine shavings on the linoleum is awfully slippery. Several of them fell on their feathered little kiesters when they first arrived.
It was really funny, actually. I tried not to laugh. I failed.
Second wall is up. This one has the nesting boxes sticking out.
Nesting boxes protruding out of the coop is traditional for a couple of reasons:
- It keeps the birds from roosting (and pooping) on the nests or nesting boxes.
- It makes it much easier to get at the eggs: don't have to go into the coop.
- It looks kind of cool.
 Got a lid on the nest box. Had an inspiration to seal the joint with a piece of innertube.
Looks kind of glorious here, doesn't it?
And got the inside wall finished. Got a door for chickens. Studies have shown that chickens like doors.
Time for a door. The best way is to make our own.
Beginning to hang the door. Actually, the door is hung, but there is not yet a door frame. That's next.
Now we need a cleanout door on the back of the coop. We wanted the boards to match the rest of the wall, so we built the entire wall, and then cut the door out.
The semi-final coop. "Semi" only because there are some details I need to finish, but the Ladies moved in this afternoon.
Whew!
The old coop, withe the pen now removed, looks a little forlorn.
Since it fits the raised beds, we might use it for a "mobile office" for the Ladies in the off-season.
Or we might sell it next spring and "re-coop" some of the costs of building the big one.
"No, girls. Those are for laying eggs, not for sleeping and pooping in."


No comments:
Post a Comment