Sunday, March 31, 2013

Big Dog Tomatos Planted

I have a whole lot of cherry tomatoes planted, including my very favorites (alright, my wife's
favorites): sunsugar.

But I wanted some tomatoes that would be big enough to slice and put on a hamburger, so I got me some seeds.

On the right, the traditional Beefsteak tomatoes.

But on the left, a tomato called Garden Leader's Monster hybrid. They promise tomatoes over a pound each! How could I pass that up?

Saturday, March 30, 2013

End of March Rhubarb

Yep. Rhubarb is doing well.

Early Starts

We transplanted a lot of things into the garden today!

Moved some kohlrabi and broccoli to the vegetable garden.


And moved some kohlrabi and broccoli to a flower garden too.

Yeah, it might be kind of early. But they all had 2 sets of real leaves. 


Also transplanted some lettuce that I've been growing over the winter.

Cheap Tags

I got tired of running down to the garden store for new plant tags. It was adding up.

So I grabbed an empty quart yogurt container, cut off the bottom and the rim around the top, and sliced it. The drawback is that they're one-season tags: have to use permanent marker. The good news: free!

Also note the start pots on the left: an old roll for Christmas paper, cut into 3" segments, the bottom split into 4 segments, folded under and overlapped.

I found the newsprint technique later, and like it better, but I needed some small ones for this tray. And really, it seems to work. Toilet paper rolls work, too, but they're pretty small.

Friday, March 29, 2013

Some Winning Starts!

Just a moment to get excited: Broccoli, onions and (yaay!) lemon cucumbers!

And the celery (from the butts of organic celery from the grocery store!) is doing really well.

The one on the left is quite a bit older. The one on the right was started with some rooting hormone on its bottom surface.

Apparently, it makes a difference.

Thursday, March 28, 2013

Tenga Hoe!

I just love saying, "Tenga Hoe!" But it's not really a greeting, it's a tool.

Specifically, it's a tool from a gardening friend who has forgotten more than I know. It's a great tool for potted plants: cleaning them, weeding in them, breaking up soil in them, fighting off both spiders and hungry children!

It's been a freakin' godsend for potted plants. And it's amazing for weeding the raised beds outside too!

Tuesday, March 26, 2013

The State of the Starts

I took a little inventory of the stars in progress. Looks like around 250. That strikes me as a lot.

These are mostly esoteric flowers.
The sunflowers, for instance, will be red.
 These didn't do as well.
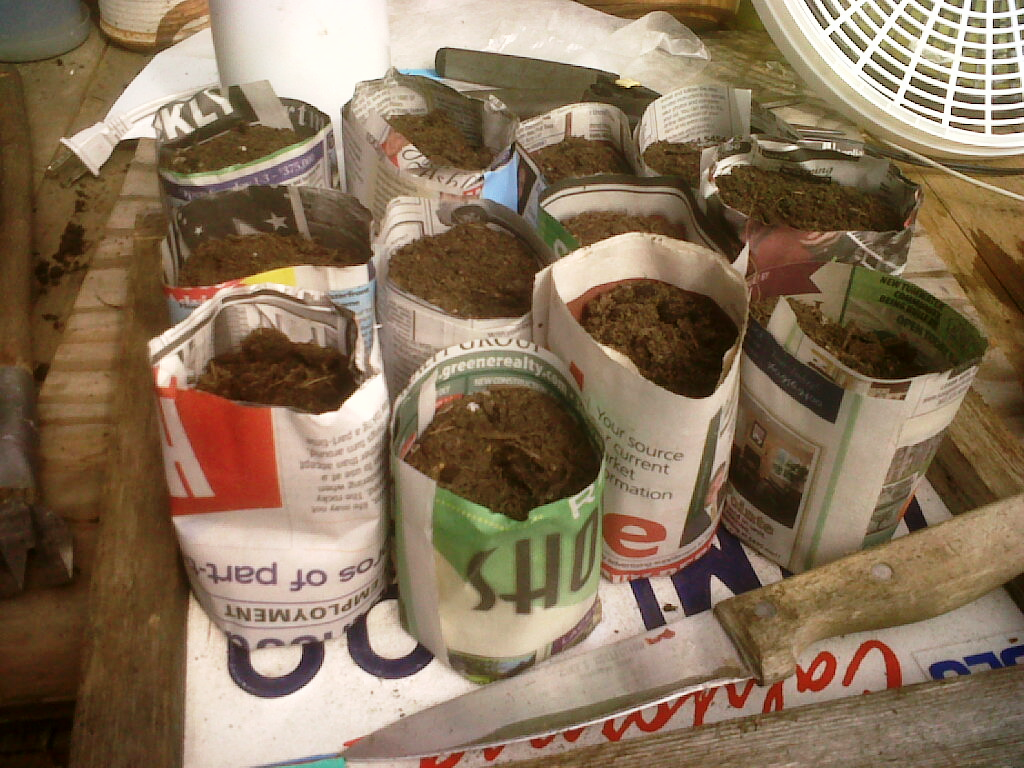
 Peppers and heritage tomatoes on top.

Basil on the bottom.
 Kale in the middle.
Cucumbers on the far end.
 Lots of squash.

These are on the warming bed. Mostly peppers, tomatoes and flowers.
Celery, cabbage, cucumbers, onions, some mystery bulbs. The most exciting, smack in the middle: sunsugar cherry tomatoes. Gathered the seeds myself. We'll see how they do.
Kale, cabbage, rhubarb, kohlrabi.
At this stage, they all look alike.
 A few haven't been planted yet. Many are herbs.
 Bottom rows aren't planted yet. Soon.
 Fresh mesclun!

These were in a bucket indoors until moments ago.
 Mystery bulbs are actually doing pretty well.
Heirloom tomatoes, gold nugger cherry tomatoes, "Assorted chili peppers"

Moving Out the Greenhouse Taters

As described before, I had some potatoes in the cupboard too long. So I planted them. They've done wonderfully.

But I wanted the greenhouse space. And I wanted more from them! So I built 2 more Tater Towers.

Rather than remove them from these pots (potatoes don't transplant well, I don't suppose), I just put the pot in the bottom of the tater tower, surrounded it all they way to nearly the top (2') of the tower with straw, and then filled in around the plants with dirt. They'll grow more taters off the plant that's buried.

The tater starts I had earlier are just beginning to bud (I should have gotten them budding before planting. Next time!). These are going gangbusters.

These are all red potatoes.

----------


Update:

I seem to have damaged the tater plants. They were not happy the next few days. 

I keep watering them. The top one (which is completely out of focus) has new growth on it.


Not sure if I see fresh growth (yet) on this one.


Monday, March 25, 2013

Building Dirt

Made a bunch of potting dirt. Here's the recipe:

5 parts good garden topsoil.
2 parts dry peat moss.
2 parts composted horse poo.
1 part (or less) coarse sand
with maybe a little fertilizer to make it spicey.

I ran it all through a 1/2" sieve, and stirred it all together.

Sure works well for all the newsprint start pots I made yesterday.

Sunday, March 24, 2013

Free Start Pots

I've been starting a LOT of seeds. I've needed a lot of start pots. More than I had. More than I could afford.

I found a GREAT new system. It involves making pots from last week's newspaper. Wrap them around the bottom of a beer bottle or Campbell's soup can.

Then fold the bottom under.

(Hey look! A shoe sale!)

They don't hold together very well until you fill them with dirt.

If I bought this many starts (at $3 each), that's $36 in starts! This is $1.79 in Ed Hume seeds and some old papers. I like it!

Another cool thing: they fit perfectly in the start trays that Home Depot throws away. The trays are free, and they hold the pots tight, keeping them from coming undone.

And once you add water, they stick together really well.

I make these out of 1/4 of a single sheet of newspaper. That means that the paper wraps around about 1 1/2 times: most of the pot is a single layer of newspaper.

So when it's time to plant them out in the outdoor garden, just put the whole pot in the ground. Or poke some holes first if that makes you feel better.

----------

Followup: Here's how they transplant: successfully. This is a good way to do these!

Saturday, March 23, 2013

Pea Progress: Nearly None

An update on the peas, which were planted mid February.

There is no progress. Or not much. I have two pea sprouts. I heard something this week about Saint Patrick's Day being pea planting season. I understand better.

For review, we planted: 
Near side: 2010 Territorial. (two sprouted)
Far side: 2011 Ed Hume (zero sprouted)

I've also heard folks say that seed peas don't last terrifically long. It's interesting that the peas that sprouted were the older ones, though. 

So I planted what I had: more of the 2011 Ed Hume seeds. But this time, I planted them mid/late March. Some of these have sprouted in pots in the greenhouse, so I infer that the weather is a factor.

I think I saw another package of seeds, 2012 seeds. I can try those next.


Transplants from Winter

I transplanted the last of the winter greenhouse goodies outside this afternoon.

We've been eating the kale for weeks. It's going to seed now, and I want the bees to reach it, because I want the seeds.

Friday, March 22, 2013

Garlic Powder (To Be)

I make my own garlic powder. The usual routine is peel the garlic, dehydrate the garlic, and grind it in an herb grinder (which is a coffee grinder that I keep exclusively for herbs & spices).

It's so much better than the stuff in the store.

My daughter inspired me to try a new version: roasting the garlic before dehydrating it. I love what roasting does to the flavor of garlic, so game on! Let's try it!

(I'll update this post on the blog with the results, after I have results!)

Thursday, March 21, 2013

A Problem with Rain Barrels

It rained really hard last night.

Apparently the overflow outlet isn't as efficient as the inflow in a rainstorm.

Sigh.

Fortunately, not much harm done. Some of the seedlings under the rainbarrel got soaked. Nearly all of them survived.

And today was sunny and beautiful. Most of them came back just fine.

(Lesson learned!)

An Appealing Tool


OK, that was a cheap attempt at a pun: an aPEELing tool. Yeah. I know. Kinda lame.

This is an apple peeler. Actually,it's an apple Peeler, Slicer and Corer, all in one.

Application is really easy: stick the apple on the tines on the end of the spiral, and begin turning the handle.


The apple rotates against the peeling blade (which is adjustable: thin or thick), and then through a coring piece with a slicing blade.

Pull the spiral-cut apple off and slice through it, top to bottom, and lay the slices into your apple pie or (even better), your dehydrator!

How does it work? Splendidly!

Plus you get some really good food for your worm box! Woohoo!

Wednesday, March 20, 2013

The Blueberry Tree

So my sweetheart knows of an office building that's going to be bulldozed next weekend. But it has plants around it! They must be rescued!

This one qualifies for the garden blog: it's a blueberry bush. Well, it's big enough, I'll call it a blueberry tree. But it is supposed to produce edible yumminess. So it's in the garden blog.

Brought it home in a 30 gallon bucket, full of the acid-y, beauty-bark soil it likes so much. And My sweetie planted it in the back garden. We specifically chose a spot that's within reach of people standing on the grass.

We rather enjoy grazing on our garden. Our peas are specifically for that purpose: we plant sugar snap peas, and we grow them up a trellis with walkways around it, specifically so we and our guests can much on them, fresh from the vines.

Afterwards, I was working in the greenhouse, watering stuff, celebrating new sprouts (like Sun Sugar tomatoes! Our own seeds! and Carnival squash! Our own seeds again!), and harvesting the red onions from the dehydrator. (They made more than a cup of wonderful onion powder! Outstanding!)

I had forgotten that we often eat dinner after work (instead of hauling trees around town!). I was interrupted by my sweetheart bringing me a fresh, juicy hamburger (with gorgonzola dressing instead of mayo! Heaven!) and a Stockyard stout.

I finished my work with a happy heart.

--------

Update: in Mid April, we got a little brother for the beastie. We should have loads of blueberries one year soon!